Photo Developer Test 1
About the test
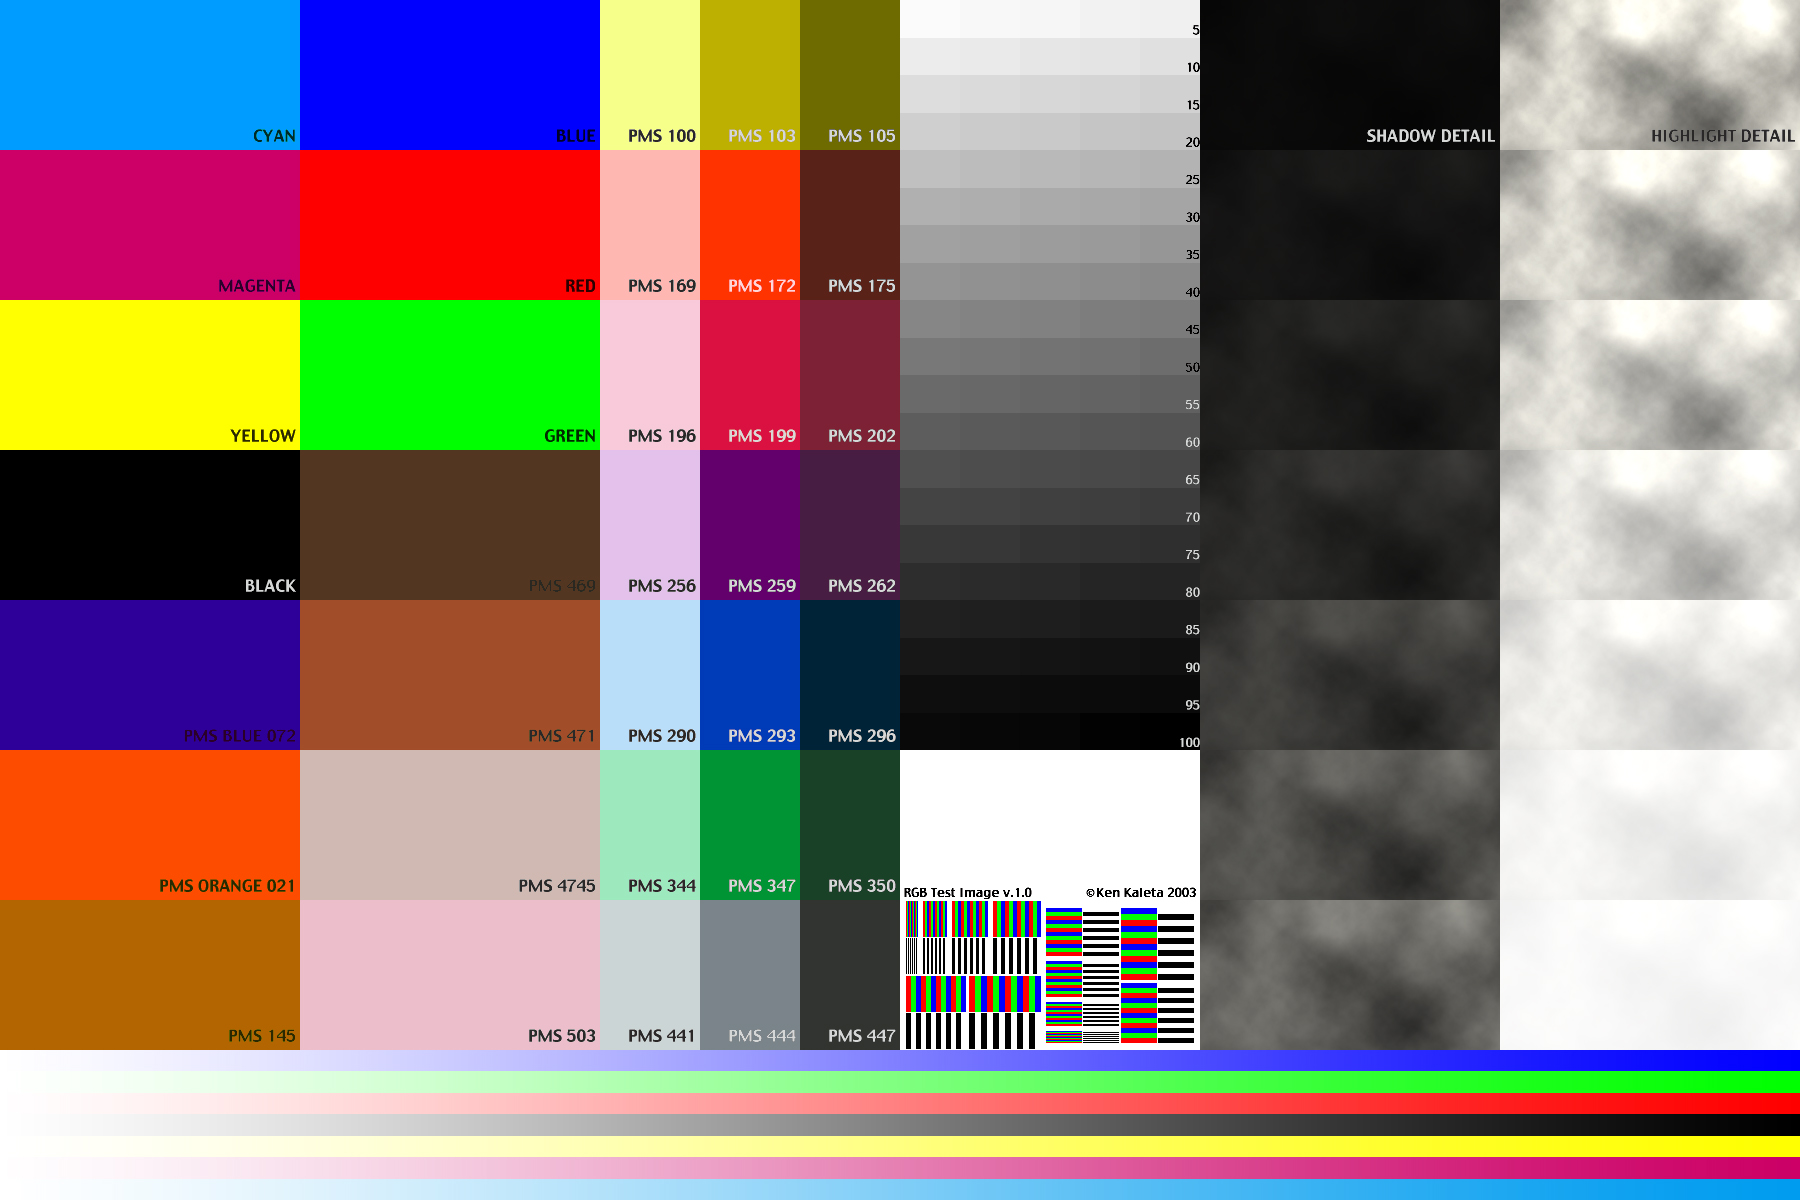
The image above is a tool to determine image exposure. The test was created in CMYK colorspace in PhotoShop and great care was taken to keep values accurate. Upon completion the test was converted to RGB. This conversion is inherently problematic:
CMYK is a subtractive color space (0=white) with a range of 0% to 100%
RGB is an additive color space (0=black) with a range of 0% to 255
Complicating things a bit more is the JPG file format. Lossy compression results in color shifts and loss of image quality.
The image above is 1800x1200 pixels displayed at 360x240. That translates to a 6"x4" photograph. Compressed as a JPG it is under 1Mb.
Interpreting the Data
Download the image. Print it or have it reproduced by the service of your choice. Examine the print closely.
The vignettes on the bottom (Red-Green-Blue and Black-Yellow-Magenta-Cyan) demonstrate smooth transition of color.
The color swatches on the left are blocks of RGB and CMYK as well as some Pantone colors.
The element in the top center is built in 1% increments of gray. Does the color drop off at the top or turn to black too early?
Below that is an unexposed area if you need to read the test with a densitometer.
The small lines in the center of the test demonstrate the resolution and registration of the image. The black and RGB horizontal and vertical rules are as small as 1 pixel in width at their smallest.
The last two rows are another test of highlight and shadow detail. At what point does the cloud turn to black or disappear?
So how does this help me?
If you are choosing a service to print your images this test will help determine the quality of the prints. Since individual tastes vary, look for qualities of the print that match your tastes with regard to lightness or darkness, cost versus quality.
If the test is being output on your printer it can serve as a guide for calibration and to gain a better understanding of printer limitations with especially with regard to highlights and shadows. If it is known where shadow becomes a muddy black or where the highlights drop off to white, images can be manipulated to cater to a particular device in PhotoShop or another image editing program. Some printers can apply calibration curves with the same effect. Again, knowing the limitations of the output device are the key.
I hope that this test proves useful.